Tasty Tuesday: Mini Ham & Cheese Quinoa Cups

Thank you pinterest for this recipe find which also lead to a new blog — Iowa Girl Eats!  Not sure how we haven’t stumbled upon Kristin’s blog or her on twitter yet, but glad we finally did!  Not only is she giving her readers tasty recipes to try but she’s also a runner – like us!

Recently I was on the search for some sort of mini quiche, mini frittata, or something of that nature for a baby shower and I stumbled upon the mini ham & cheese quinoa cups. I gave them a test run the week of the shower,  thought they were fabulous and was ready to count them as a part of my contribution to the shower food!

This recipe makes 28 mini cups and calls for –

Ingredients:

2 cups cooked quinoa (about 3/4 cup uncooked)

2 eggs

2 egg whites

1 cup zucchini, shredded

1 cup shredded sharp cheddar cheese

1/2 cup diced ham

1/4 cup parsley, chopped

2 Tablespoons parmesan cheese

2 green onions, sliced

salt & pepper to taste

To get started preheat that oven to 350 degrees and get going on cooking and chopping up the ingredients!  Follow the instructions on the box of your quinoa to cook it correctly.

My favorite vegetable chopping/slicing contraption!!

Combine ALL of the ingredients into a large mixing bowl and mix it all up!

Grab your mini muffin pans and spray them with a non-stick spray and don’t just lightly spray make sure you really cover the pans with the non-stick spray.  Begin spooning out the mixture into each muffin pan.

I used normal size muffin pans on my first go ’round

The recipe calls for cooking them about 15-20 minutes, but I either have always had the slowest cooking oven in the world or….well, I don’t know what.  I definitely left them in the oven for more like 25-30 minutes, so just make sure to watch the sides and when they start to turn a golden brown you are safe to take them out of the oven.  Give them about 5 minutes to cool then remove the quinoa cups from the muffin pan.

There you go! Cute little delicious Ham & Cheese Quinoa Cups.  Next I’ll have to get brave and experiment with different ingredients!

And here is how the nutrition stacks up on the quinoa cups –

Should also add that these mini cups reheat well. If you were to make them for say a baby shower or something similar like I did the mix does well if you make it the night before, refrigerate and cook them the next day.  Or you could simply make about half the recipe, save the rest of the mix and make it the next day.

Are you a big quinoa fan? What’s your favorite recipe involving quinoa?

Tasty Tuesday: HG Style Chicken Cordon Bleu

How many of you have already heard of Hungry Girl?  Well, we have too and have both been HG followers for six-ish years now!

We both own multiple HG cookbooks and sometimes when you find one of their recipes that’s de-lish you HAVE to spread the word.  The Hungry Girl created their own version of Chicken Cordon Bleu back in April of 2009 and I’ve made it a number of times it had just been awhile since the last time. 🙂   HG makes a lot of their recipes as a single serving in case you are the the solo healthy eater in your house or just cooking for one regularly, but they are normally quite easy to double, triple, etc.

The ingredients are pretty simple:

1. one 5oz. raw boneless skinless lean chicken breast (I just grabbed a whole package of chicken breasts since I was not eating alone this night)

2. one wedge of The Laughing Cow Light Creamy Swiss cheese and let it get to room temperature (loooove this stuff!)

3. one oz. (about 3 slices) of 97-98% fat-free ham slices (in this case since I was making it for more than just me so I bought a slightly fancier ham instead of just your traditional sandwich meat varieties)

4. salt and pepper to taste

Start by preheating your oven to 350 degrees.

Once you’ve trimmed your chicken of any fat you’ll need to place it in a large sealable plastic bag and get as much of the air out as possible because next you gotta pound that meat to get it flat!  Pound it! Good way to get out some aggression if necessary! 🙂

Try and get the chicken to be about 1/4 of an inch thick.  Pretty positive I am a little too impatient for that, so at least give it some flatness! Then take the chicken out of the bag and beginning seasoning it to taste with your salt and pepper!  Grab your cheese wedge and spread that Laughing Cow Cheese over one side of your chicken like so…

This looks so appetizing right now, doesn’t it??

Please note you’ll want to spray your pan with a nonstick cooking spray or line it with foil before placing the chicken in the dish. 🙂

Next you’ll place your slices of ham on top of the side of the chicken you smeared with cheese, like so…

Roll up the chicken breast as tight as you can with the ham and cheese side on the inside of the roll.  It is probably easiest to then keep your chicken rolled up by securing it with a toothpick or two.

Cover your dish with foil and bake the chicken for 20 minutes.  With a hot pad or something else that will keep you from burning yourself remove the foil and let the chicken cook for another 15 minutes.  Then voila!  We decided to have whole grain couscous and broccoli with our chicken cordon bleu this time around!

Tasty looking, right?

Based upon the ingredients typed out above Hungry Girl has given the following nutritional data for their Chicken Cordon Bleu:

Sorry to our meat-less readers as this recipe is not really for you! :-/

Have you tried any Hungry Girl recipes before? What’s your go to HG recipe?

Tasty Tuesday: Stuffed Bell Peppers

This is something that I make all the time because it is super easy and I can eat it for lunch or dinner throughout the week. It’s a very easy way to get tons of veggies and protein during that day. You can easily add or change the veggies to your liking or even what you have left over in the refrigerator!

Here’s what you do (nothing is really exact because it doesn’t have to be!)

Cut 6 bell peppers in half (any color), take out the guts, and place in a glass baking pan.

20120710-090803.jpg

Cover the bottom of the pan with water about a centimeter or so high- this keeps it from burning the bell peppers in the oven

Grill 1 pound ground beef, bison, or turkey in a pan.

20120710-090929.jpg

When your meat is about half way browned add your veggies. I did a can of corn, black beans, and diced tomatoes. I also had left over rice with carrots and green beans in it so I added about a cup of that so it wouldn’t go to waste. Mix everything in. If you like spice, add salsa and green chili at the very end.

20120710-091030.jpg

20120710-091039.jpg

Stuff your peppers. Fill them as much you can! I always end up with extra meat and usually just make tacos with it the next day.

20120710-091150.jpg

Place in the oven for 30 minutes on 375. If you like, you can add cheese to the tops during the last 5 minutes.

Nutrition facts :This is from entering the ingredients in myfitness pal and calculating for 6 servings- 1 full bell pepper each

Calories: 298

Fat: 5.9 grams

Carbs: 36.5grams

Do you make stuffed bell peppers? What do you different from this recipe?

Tasty Tuesday: Crockpot Chicken Taco Meat

A couple of weekends ago we got together with some of our friends and had a taco dinner much like our wine dinner we had back in January.  We had brisket tacos and chicken tacos, but the chicken taco recipe*** was such a breeze we HAD to share this one with you!  Especially since there are probably a lot of things you could do with the chicken once it’s cooked besides just using it as taco meat.

Ingredients:

3 Tablespoons of taco seasoning

1 cup of chicken broth

1 pound of boneless and skinless chicken breasts

Directions:

Clean your chicken and trim off that fat!  Pour your chicken broth into your crockpot then pour in the taco seasoning and let it dissolve in the chicken broth. Then place your chicken breasts in the crockpot.

Not the most exciting picture, but the chicken broth should pretty much cover your chicken breasts and who doesn’t love crockpot liners for an easy clean up??

Put it it on low and cook for 6 hours.  Once it’s finished cooking you’ll have such tender chicken it’s literally falling about trying to get it out of the crockpot.

Then serve it to your guests should you be having a taco dinner party or divide it up to eat throughout your week!

If you use this same recipe and create something other than just the chicken taco meat being sure and SHARE IT with us!! We would love to know!  Hope you enjoy this recipe and how easy it really is!

**source

Tasty Tuesday: Mason Jar Salads

I am sure you guys have seen these if you are on Pinterest at all, but I really hadn’t paid much attention to them until I got to start actually eating lunch with adults at school again! My friend from work came in with her salad in a mason jar and I wanted to try it! Here it is in steps! I am super excited about this, I used to bring my salads in a plastic bag but this seams way easier with the dressing and everything!

I bought 12 mason jars for less than 10 bucks- I am just using the extra as cups!  Then follow these steps:

  1. Place your favorite dressing at the very bottom: I used Newman’s Own Organic Balsamic
  2. Place something that can be used as a barrier and you wouldn’t mind being soaked in the dressing- I used bell pepper
  3. Layer on what you want! These salads have mushrooms, red onions, cherry tomatoes, craisins, and ½ cup of cooked quinoa
  4. After you have placed in everything you want pile in as much lettuce as you can fit! I used an organic spring mix!
  5. Store and eat. Everything I have found says that they will keep for a week!

Nutrition info in case you were curious brought to you by myfitnesspal

292 calories

58 carbs- if this is too high for you take out the craisins: they have 25 grams

6 grams of fat

7 grams of protein

**Advocare Note: If you make this recipe during your 10 day cleanse you’ll need to count quinoa as your one carb for the day AND for salad dressing you’ll need to use either oil & vinegar or lime juice**

Tasty Tuesday: Skinny + Enchilada = Healthy Goodness

For a couple of months Beth has had some food goals – one being prepare your meals and the most recent one was try two new recipes for weekly meal prep!  Well she took her search to google and decided to try and find a skinny enchilada recipe which quickly led her to recipe created by She-Fit!  Ruth has some other great recipes listed on her blog that I hope I find time to make as well!

But back to the skinny enchiladas – look through the ingredients and everything sounded very do-able!

To get started you need to pre-heat your oven to 350.  Then lightly spray a 9×13 baking dish.  After you chop up your onion and bell pepper you are going to saute them in a pan.  Once the onions are a lightly brown mix your veggies with the Greek yogurt, chicken and cheese (if you are like me and boiled your chicken in chicken broth to cook it obviously that is going to be your real first item on the list to accomplish).

You’ll want to evenly spread out your mixture into 9 tortillas, roll them up and place them seam down in your baking dish.  Ruth’s recipe calls for wheat tortillas, but where would the fun be if I didn’t try something different??  I used corn tortillas instead! I have actually made this recipe twice now and the first go round I used Tia Rosa brand tortillas which pretty much broke immediately after being set down in the baking dish.  One the second go round I used Mission corn tortillas which had very little if any breakage of the tortilla!

Next you want to evenly coat your tortillas with the salsa and Greek yogurt mix then sprinkle with cheese! Voila! Your enchiladas are ready to bake!  The recipe calls for placing foil over the dish which I didn’t do, but maybe I should one of these days and see if it makes a difference.  Nonetheless, bake those bad boys for 15-20minutes.  Maybe in an effort to give some love to Ruth and her blog you should click here to find out about the nutrition facts!

One other little fun thing about this recipe is you can totally change up the taste of it simply by using a different type of salsa!  My first time making this recipe I decided to use a salsa verde, but the second time after perusing all the salsa choices at my local grocery store I chose to buy a local brand salsa – Hazelwood’s Smoked Chipotle.  The flavor was completely different and just as delicious from that one change up!

Have you tried this version of skinny enchiladas?  What’s your favorite skinny recipe to make?

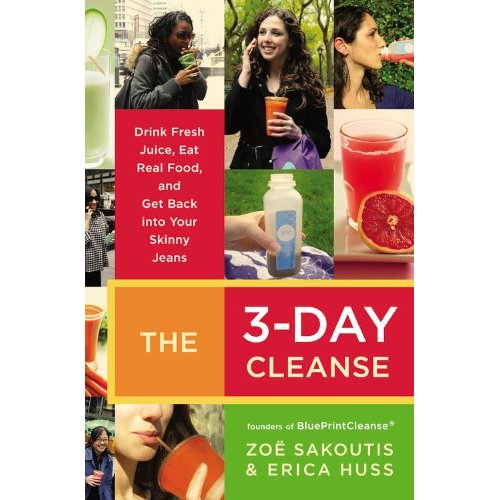
BluePrint Cleanse Recap

As you saw in my April goals #1 was to survive the BluePrint Cleanse. At the advice of my trainer and basically just myself and my sanity, I decided to do a more intense cleanse then I had done before. I can not afford the actual BluePrint Cleanse, where they actually send you everything made because it runs about $75 bucks a day plus shipping so, yea, I’m a teacher, that won’t work. I decided to just buy their book and buy the supplies. The total cost of everything, including a 3 day pre-cleanse and 3 day post-cleanse ran about $110 bucks. Not bad for 9 days worth of food!

The pre-cleanse is basically 3 days of preparing your body to deal with straight juice for 3 days. I know, and you probably do too that when we know we aren’t going to eat or we are going to be “cut off” of things then we cram food. Like maybe decide to eat the most fattening meal ever the night before, well, if you did that and went straight to juice you would die. I didn’t do that anyways but I still wanted to pre-cleanse. This was totally not bad and runs around 1100-1200 calories. I was still able to work out too!

Pre-Cleanse:

Day 1: 2 pieces of fruit, gazpacho, veggies and hummus, veggie tacos (avocado and sprouted corn tortillas)

Day 2:  basically the same but instead of veggies you can have a larabar

Day3:  basically the same but for dinner you eat a big salad with tons of veggies

Prep for the actual cleanse is a little insane and this is where I do wish I had a money tree! Juicing is messy and I cut my finger on the stupid pineapple. I made my juices over two nights because honestly it took me forever. The juice will keep for the 3 days if you do it all at once!

Here is what you drink

1-     greens with apple

2-     watermelon

3-     greens with blueberry and apple

4-     pineapple and mint

5-     greens with apple

6-     milk drink (basically ground cashews, coconut oil, water)

Day 1: I started the actual cleanse on a Thursday and had to work. I teach so this made me extremely nervous. I even freaking spilled my green drink at my desk! I almost cried! Also I am essentially trapped in a room for hours at a time with very short breaks to actually go the bathroom. It really was not too bad though. I did have to go to the bathroom at least once an hour just due to the increase in liquids. But I mean nothing bad that I’m embarrassed to say 🙂 I chose the second level of cleansing because I have done cleanses before and figured I could handle it.

See the spill?

Day 2: This day really was the worst, I just really wanted to chew, but was not that hungry! I did not like the “milk” drink you take at night and couldn’t drink it. It’s made with ground cashews so instead of drinking it I just ate a handful. I don’t think I actually ruined anything with this but who knows – the chewing just might have saved me. I did have to take “smooth move” tea, because I really wasn’t going #2 haha! That worked out well!

Day 3– I actually really did feel awesome. I was full, my joints weren’t hurting, not even in my knees, and my eyes no longer really had bags under them! I felt really good and still do even today! I ended day 3 with my last green drink and right before bed ate some more cashews.

Honestly I was not hungry. I actually didn’t even want to drink all of the juice sometimes because I didn’t feel hungry. The drinks do not taste bad, the green one takes some getting used to, and if I actually liked coconut I would have liked the “milk.” At this point, I am not 100% sure how much weight I lost. On the second day I was down a full 5 from the last time I weighed right before, and today at the gym, 2 days after the cleanse is completely over, I was down 8 pounds total. Not bad, the weight is awesome, but I also for the first time just feel really good!

Just my advice:

–          Drink lots of water and green tea- so much so that you think you will pop

–          Buy smooth move tea – it doesn’t taste bad and works

–          Learn to love Apple Cider Vinegar and drink it if you are hungry (mix with a little honey and drink warm) it’s the least gross way!

–          Plan!! And don’t do this when you have to go places, its annoying to carry a cooler – I took one to school and it annoyed me with all the ice!

–          Your kitchen will be a holy mess, so if you are crazy like me learn to breathe!

Beware of weird questions! Liiike – What the hell is that? Is that gross? What are you doing? Why would you do that? That’s weird. (Oh and evil sideways stares at the grocery store because your buggy has far too many fruits and veggies)

-Teal

Snack Bags on the Go & Guest Blog Post

If you saw our Wordless Wednesday post yesterday then you have officially seen each of our snack bags that we carry around!  Do you like how we both happen to have the same exact one? We can’t help it if Lululemon makes the perfect size bag for carrying snacks!  Remember in December when Teal discussed her weight loss and how preparing her meals ahead of time was one of the keys to her being successful? Well, you never know when you might need a snack or if you are good with eating every few hours you might have your own stash of snacks somewhere too.  And obviously being prepared is the easiest way to make sure that you are eating healthy options!  So here is what we’ve got in our Lululemon snack bags:

– Fruit: apples and orange varieties

– Nuts: almonds, pistachios, cashews

– Protein bars: Larabar, Kind bars….not pictured but we are also Luna bar fans

Nuun: Grape for Teal and Tri-Berry for Beth

-Peanut Butter especially Justin’s nut butter!

-Beef Jerky

-Snack Well 120 calorie pack…while not the best thing to snack on but sometimes you need to fill a sweet craving!

Another snack that Beth loves but is not in her snack bag right now would be wasabi peas! Mmmm!

Do you carry a snack bag around with you?  Is there anything we are missing that you put in it?

One last thing before you go – the lovely Ashley over at A Healthy, Happier Bear featured us in her Marathons + Moderations blog series yesterday! If you missed it than follow this link to see it!  Thank you so much, Ashley!!

Break? I Don’t Need No Stinkin’ Break….OK, Maybe I Do!

On our March goals I mentioned that I wanted to survive my 2 week rest without cheating and we figured that that you might need a little more explanation. So here goes…

(source)

Not too long ago I told you guys about my weight and my efforts to lose weight. I had been the heaviest in my life and not happy so I decided to do something about it. I managed to drop down quite a bit but have essentially been stuck at my current weight for a while now. At first I just had no loss or gain, and then all of a sudden an actual gain in fat for the first time in 2 years. To me, and many others this may seem odd, I work out basically everyday, run all the time, play basketball, swim, workout with a personal trainer, track my food, have very few cheat days…. you get the drift…an actual fat gain seems pretty impossible to me. So what is the problem?? It is calorically impossible in my opinion for this to happen.

I talked to my trainer, Will, about this a lot, he dug into what he knows and asked around as well and basically came to a consensus that I am overtraining and my body is in an adaptive mode all the time. So while I have fallen into a very healthy routine of exercise and eating right my body has too and has basically decided it is going to stay where it is. Thanks body – love you too!

Talk about motivation killer. I think I actually had a pitty party at the gym the day I was weighed and even broke down and decided exercise and everything I was doing was pointless and stupid, a waste of time.. blah blah blah. Ever feel like this??

I would say that this is similar to when people decide they have to make a change and come to a breaking point. Will asked me if it was feasible to take 2 weeks off from working out and move my body from adaptive mode and into recovery. I cringed of course. I have 2 half marathons in March, hence part of the problem, but I decided to do it. During this time I am going to do no running or cardio. I will weight train 2 times a week with Will and yoga 2 to 3 times a week. Getting my runner self  to not run 3-4 weeks before a race is a little scary, but I am too frustrated to stay where I am and not try something new! I can’t help but think of the insanity definition here. Can’t keep doing the same thing and expecting something to change.

Also, Beth and I both joined MyFitnessPal this week. I have always tracked her food on myapex but I found that it is less convenient. Sorry 24 Hour Fitness! MyFitnessPal works super easy on the phone and has more food listed so it makes it much easier to track food better. So with the rest, I am also becoming more on point with food.

Anyone ever been through this madness before? Let us know!  What did and did not work for you??

Slow Cooking Goodness

As we mentioned in our Cleanse Recap that Beth recruited her sister to do the cleanse with her, and after a couple days of eating pretty bland food Kate decided to research recipes that would work for the cleanse.  Ironically enough Kate found a recipe on Tosca Reno‘s website which Teal had introduced Beth to her books this past year!  If you don’t know who Tosca is, well, she is the author of the Eat-Clean Diet series as well as a model, spokesperson, media personality, motivational speaker/wellness consultant and Nutritional Therapy Practitioner.  Even if her recipes aren’t ALL for you there is a lot in her books/cookbooks to look over, draw inspiration from and just experiment with on your own personal preferences.

Beth conveniently bought a crockpot for Kate for Christmas which allowed us to try out Tosca Reno’s Slow Cooker Mexican Chicken recipe from her website!

Top is all the ingredients in the crockpot and the bottom is the meal on top of brown rice ready to eat!

(source)

This meal is definitely a realistic clean eating alternative for you, your family or to have for multiple meals in one week!  We made the entire recipe two times throughout the cleanse.  The first time Kate was so gracious to share it with Beth & Brent and the second time it was made for two meals each for Kate & Beth.  If you would like to give this recipe a try here is a direct link to the recipe.  Let us know how you like it and if you experimented with it at all!

What is your favorite crockpot meal?  Have you found a lot of healthy eating crockpot meals?